Sushi, the exquisite Japanese delicacy, has captured the hearts and taste buds of people around the world. While enjoying sushi at a restaurant is undoubtedly a treat, there’s something special about crafting your own sushi rolls at home. Creating sushi is not only a culinary adventure but also a way to express your creativity. In this step-by-step guide, we’ll walk you through the process of making sushi at home, from selecting the ingredients to perfecting your rolling technique. Get ready to embark on a delicious journey!
- Gather the Essential Tools and Ingredients:
To make sushi at home, you’ll need a few basic tools and ingredients. Here’s what you’ll need:
- Sushi rice: Choose short-grain Japanese rice, known for its stickiness when cooked.
- Nori seaweed sheets: These thin, dried seaweed sheets provide the outer layer of your sushi roll.
- Sushi vinegar: A blend of rice vinegar, sugar, and salt, used to season the sushi rice.
- Fillings: Traditional options include fish (such as tuna or salmon), seafood (like shrimp or crab), vegetables (cucumber, avocado, or carrots), and condiments (soy sauce, wasabi, and pickled ginger).
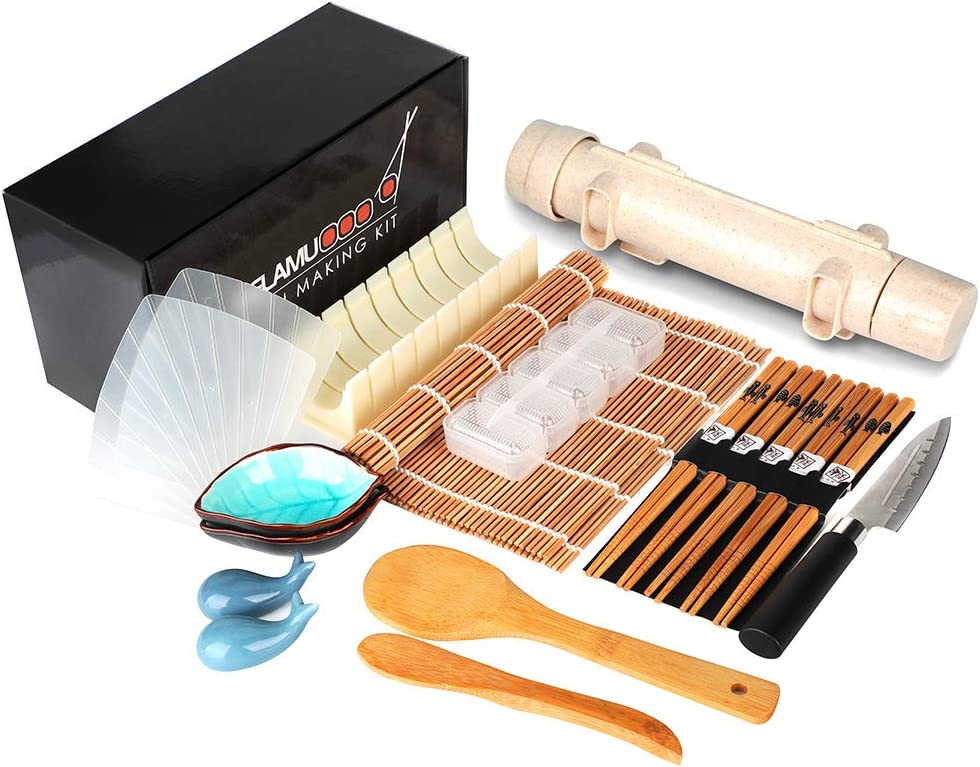
- Bamboo sushi mat: This mat is used to roll the sushi tightly. Get a full kit HERE
- Sharp knife: A sushi knife or a sharp chef’s knife will help you slice the rolls cleanly. Recommended knives are 1) Damascus Kitchen Knife 2) German High Carbon 3) Japanese Kiritsuke Chef Knife
- Bowl of water: This is essential to moisten your hands while working with sushi rice.
- Prepare the Sushi Rice:
Properly cooked sushi rice is the foundation of any delicious sushi roll. Here’s how to make it:
- Rinse the rice: Place the desired amount of rice in a bowl and rinse it under cold water until the water runs clear.
- Cook the rice: Add the rinsed rice to a pot with the appropriate amount of water. Bring it to a boil, then reduce the heat and simmer for about 15 minutes, or until the rice is tender and the water is absorbed.
- Season the rice: In a small bowl, mix sushi vinegar (made by combining rice vinegar, sugar, and salt) and gently fold it into the cooked rice while it’s still hot. Allow the rice to cool to room temperature.
- Prepare the Fillings:
While sushi offers endless possibilities for creativity, start with a few basic fillings to get comfortable with the process. Slice the ingredients into thin strips or small pieces, ensuring they’re uniform in size for even rolling. Remember to remove any bones or skin from fish fillets.
- Assemble and Roll the Sushi:
Now it’s time to bring all the elements together and roll your sushi like a pro:
- Place a sheet of nori on the bamboo sushi mat.
- Moisten your hands with water to prevent the rice from sticking. Take a handful of sushi rice and spread it evenly over the nori, leaving a small border at the top.
- Arrange your desired fillings in a line across the center of the rice.
- Lift the edge of the sushi mat closest to you and roll it over the fillings, applying gentle pressure to create a tight roll.
- Continue rolling until the entire sheet is wrapped, then press the sushi mat gently to ensure it holds its shape.
- Repeat the process with the remaining ingredients, experimenting with different combinations.
- Slice and Serve:
Once you’ve rolled your sushi, it’s time to slice and present it beautifully:
- Wet your knife with water to prevent sticking. Carefully slice the sushi roll into bite-sized pieces, about 1 inch thick.
- Arrange the sushi rolls on a platter and garnish with soy sauce, wasabi, pickled ginger, and a dollop of wasabi.
- Serve your homemade sushi rolls alongside soy sauce, wasabi, and pickled ginger for a complete sushi experience.
- Tips and Tricks for Success:
- To elevate your sushi-making skills, here are some additional tips and tricks:
- Use a sharp knife: A sharp knife ensures clean cuts and prevents squishing the sushi rolls.
- Wet your hands and knife: Wetting your hands with water prevents the rice from sticking, and wetting the knife helps with smoother slicing.
- Experiment with fillings: Don’t be afraid to get creative and try different combinations of fillings. Mix and match flavors and textures to suit your preferences.
- Practice rolling techniques: Rolling sushi takes practice. Start with simple rolls and gradually progress to more complex ones as you gain confidence.
- Keep it fresh: Sushi is best enjoyed fresh. If you’re not serving it immediately, cover it with a damp cloth or plastic wrap to prevent the rice from drying out.
- Enjoy the process: Making sushi is as much about the experience as it is about the final result. Embrace the process, have fun, and enjoy the satisfaction of creating your own culinary masterpiece.
Making sushi at home is a rewarding and creative endeavor that allows you to tailor the flavors to your liking. By following this step-by-step guide, you can embark on a delicious journey of crafting sushi rolls right in your own kitchen. From selecting the ingredients to perfecting your rolling technique, you have the power to create sushi masterpieces that will impress your family and friends. So, put on your chef’s hat, gather the tools, and let your culinary creativity shine as you embark on your homemade sushi adventure!


